Step 0: Checklist
Before you flash a firmware to your Pxx keyboard, you will first need at least a fully assembled Pxx PCB plugged in a computer and a firmware. The easiest way to create one through config.qmk.fm. Make sure the you select the correct keyboard and version before you create your layout.
Proceed to the next steps once you have your firmware, .hex file.
Step 1: Bootloader
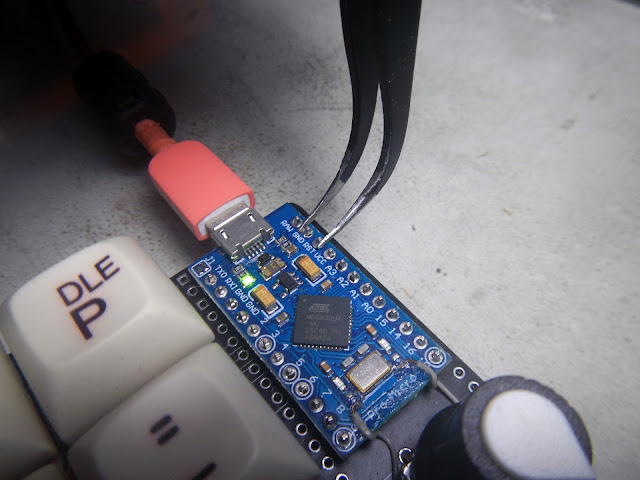
Pro Micro microcontrollers need to be in bootloader state before a firmware can be flashed. To enter bootloader state, you need to ground the RST + GND pins while the keyboard is plugged to a computer. Please refer to the image below for the location of RST and GRN pins.
On a kit where the top of pro micro is facing back of the PCB, like P20 and P40, RST and GND pins can be found here:
On P42, RST and GND can be easily found. Here's a photo showing its location and tweezers I use to ground the pins:
 |
| Please ignore the wires. This is my personal P42 where I needed 2 additional pins. That is also the reason why solder is minimal, i wanted it to be easy to remove if needed. |
There are instances that you will need to pull reset twice very quickly (double-tap as some call it) before bootloader state loads.
Step 2: QMK Toolbox
Now that you know the location of the ground pins, open QMK Toolbox. If you do not have this yet, download a copy from this their official site.
The following is what QMK Toolbox will look like this when you reset your pro micro.
Make sure you click Flash when you reset for you will only have 8 seconds. Pro micro will unload bootloader after this. You will need to reset again when bootloader unloads and failed to flash.
Below is what it will look like once a firmware is flashed:


Comments
Post a Comment